Overview
Strong liability proof depends on organized witness management. Lextiff's Witnesses module lets your litigation team track eyewitnesses, police officers, and first responders, assess witness favorability, monitor statement and deposition status, and link signed declarations or collaborative notes directly into your central document repositories.
Step 1: Add Eyewitnesses & Investigating Officers
- Open your active case workspace and select Detail under the CASE menu on the left sidebar.
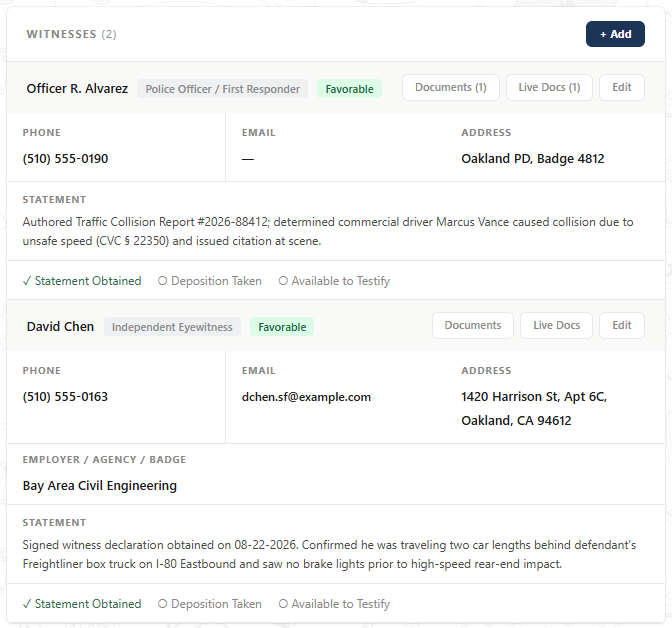
- Locate the Witnesses panel and click + Add.
- Enter the witness's full Name, select their Witness type (such as Independent Eyewitness or Police Officer / First Responder), and rate their Favorability (Favorable, Neutral, or Adverse).
- Record their Employer / agency / badge # (for example, Oakland PD, Badge 4812), contact details, and service address.
- Check Statement obtained, Deposition taken, or Available to testify as applicable, enter a summary in Statement notes, and click Save.
Step 2: Upload & Auto-Sync Signed Witness Statements
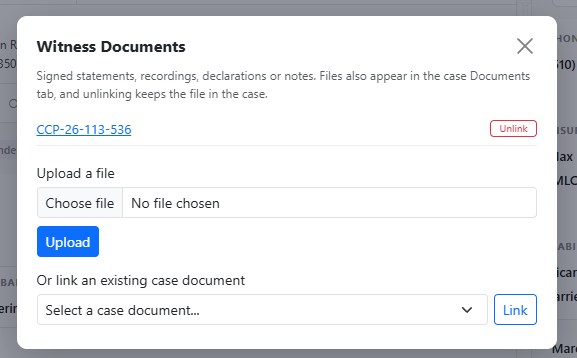
- On any saved witness card, click Documents to open the Witness Documents modal.
- Upload a PDF declaration, audio recording, or traffic collision report (or link an existing file from the case).
- Uploaded files automatically sync to your main Documents tab under the Witness Statement category—eliminating duplicate uploads while keeping files accessible from both views.
Step 3: Collaborate on Witness Prep with Live Docs
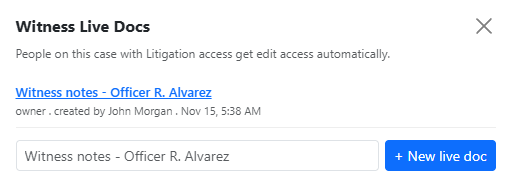
- Click Live Docs on the witness card to launch a real-time collaborative note (such as Witness notes - Officer R. Alvarez).
- Everyone on the case with Litigation access receives edit permissions automatically.
- Lextiff automatically organizes these notes inside a dedicated Witnesses folder under the Live Docs section in your left navigation sidebar so deposition outlines and interview notes stay neatly structured.