Overview
Every email, e-signature link, and client portal request your firm sends shapes how clients perceive your practice. Lextiff combines centralized Firm Profile & Branding settings, tracked Client Document Requests, and 40+ Customizable Email Templates so your firm delivers a consistent, white-labeled client experience from initial intake through final settlement disbursement.
Step 1: Configure Firm Identity & Dynamic Merge Variables
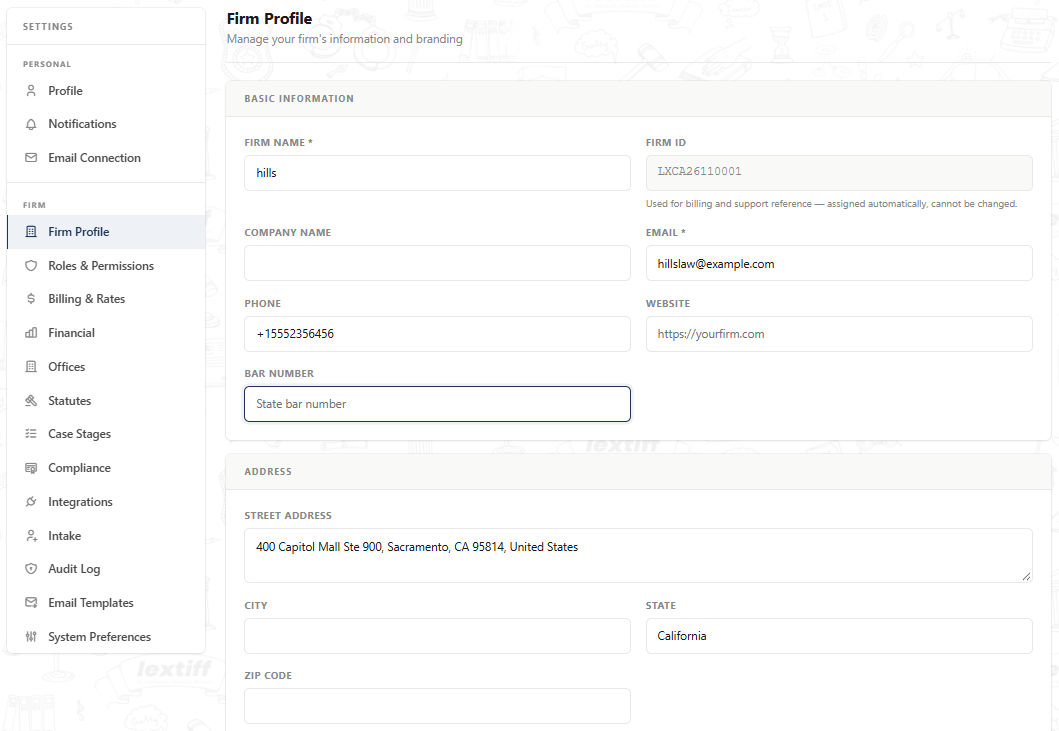
Lextiff centralizes your practice details in one profile so every outbound notification, portal invitation, and generated legal document reflects your firm automatically:
- Navigate to Settings → Firm Profile.
- Under Basic Information, enter your editable Firm Name (which dynamically populates merge tags such as
{{firm_name}}across all automated emails and documents), Company Name, primary contact Email, Phone, Website, and State Bar Number. - Your system-assigned Firm ID (such as
LXCA26110001) remains locked for billing and audit traceability while your display name and contact details can be updated anytime.
Step 2: Upload Full & Compact Logos for Light and Dark Surfaces
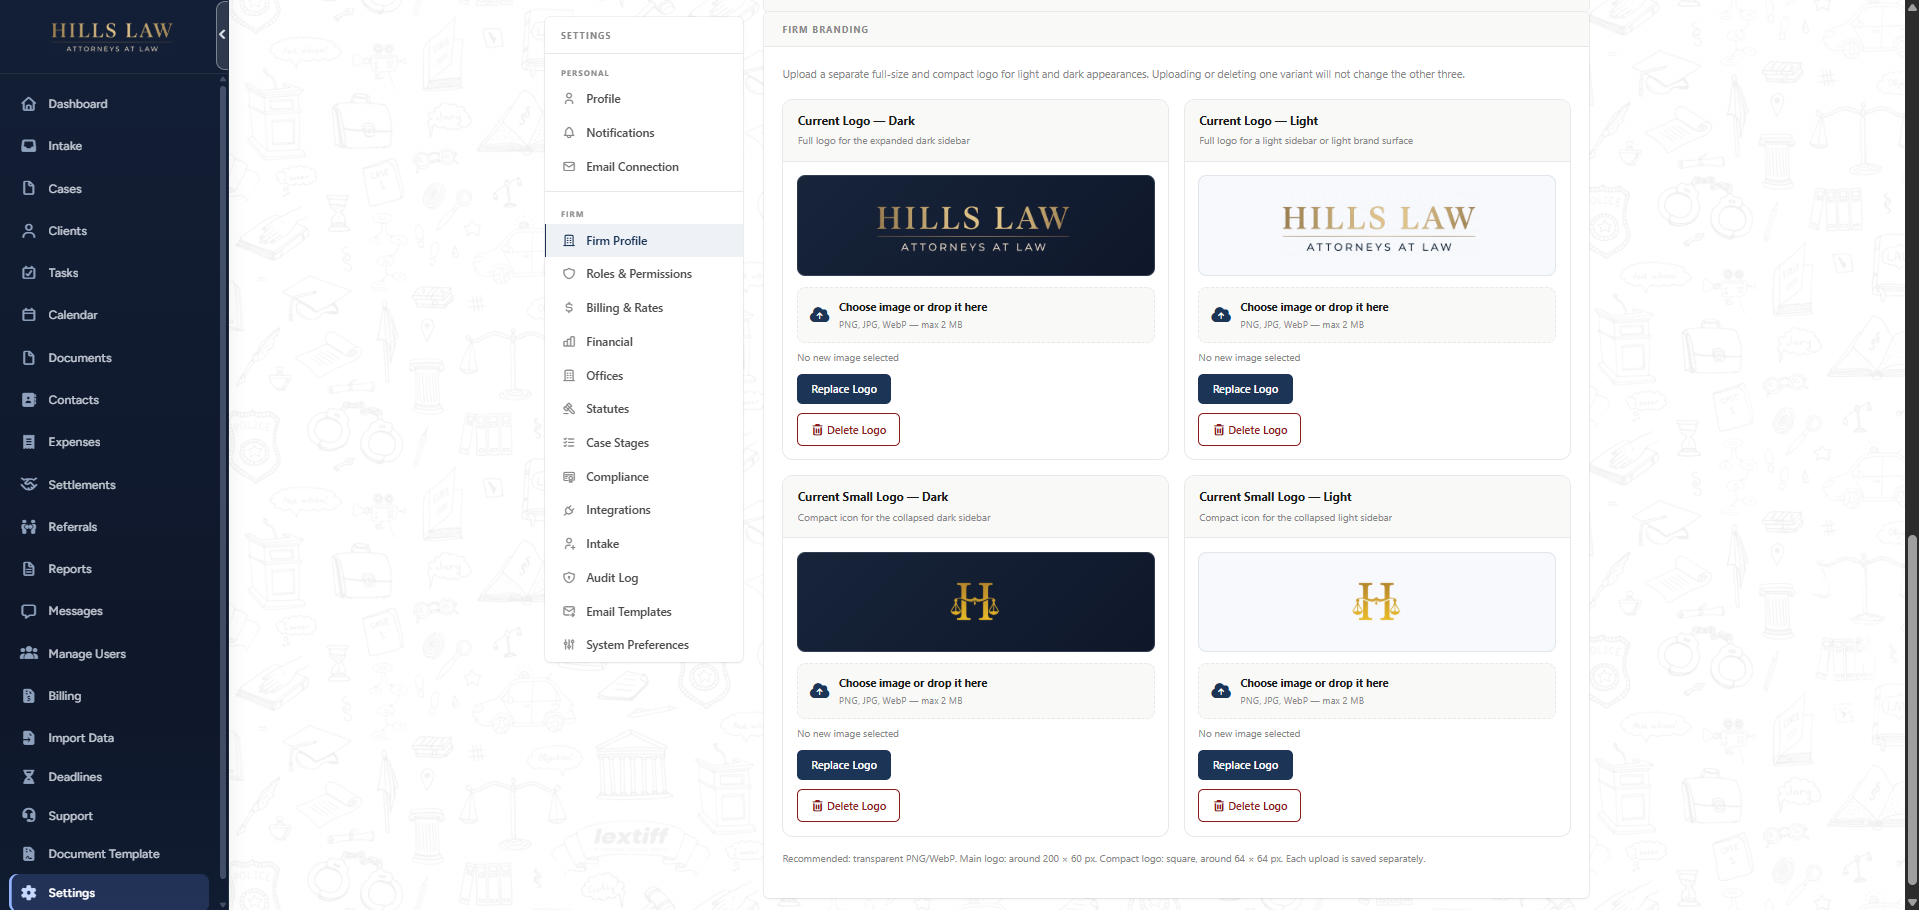
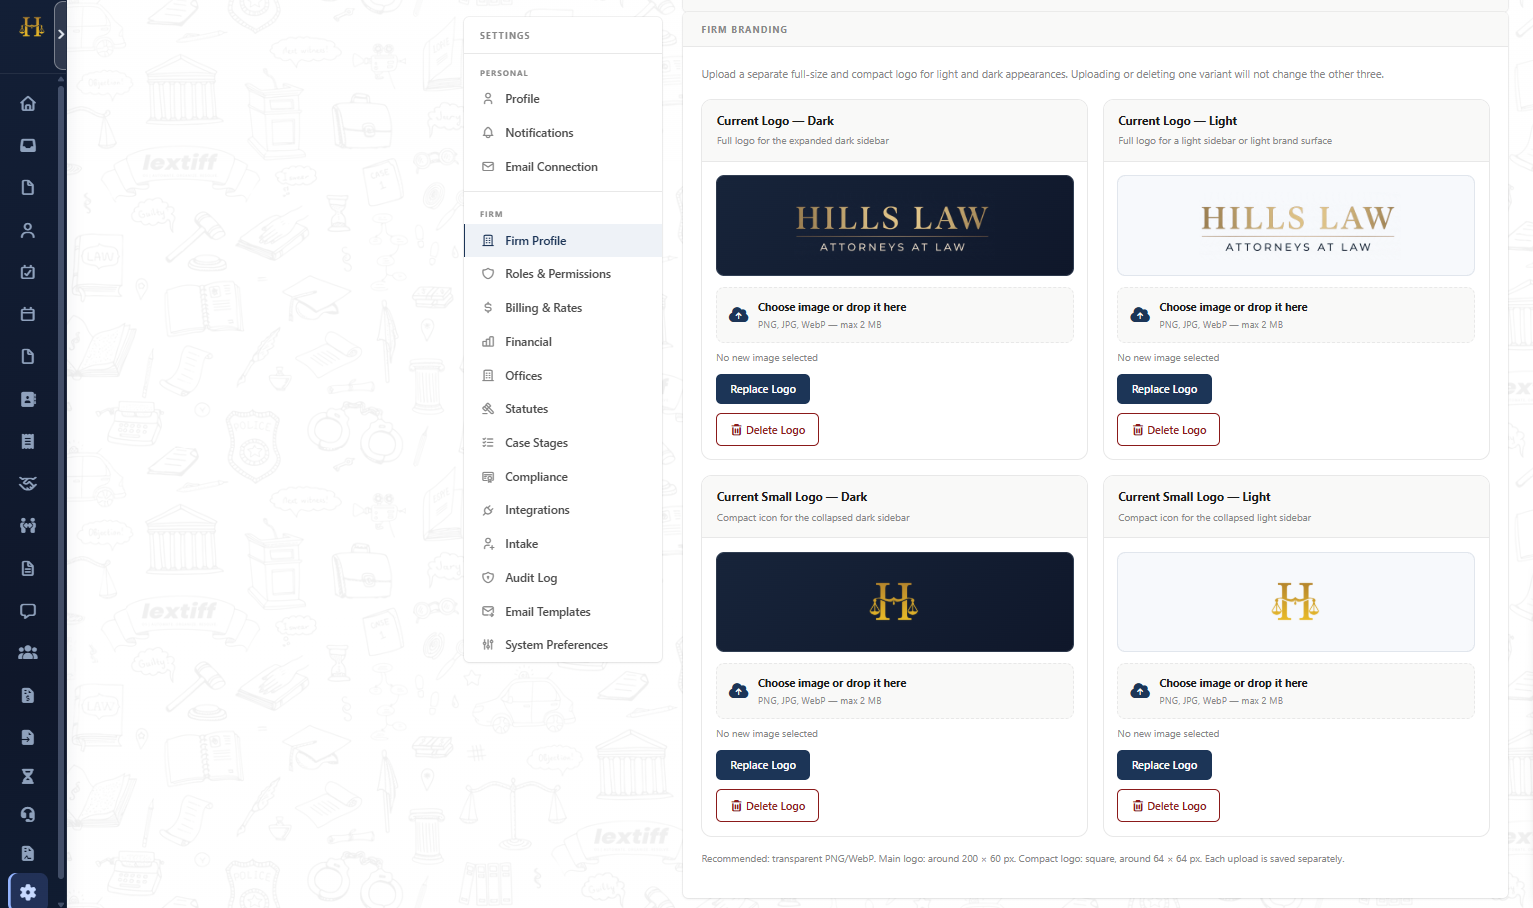
Instead of forcing a single logo onto mismatched backgrounds, Lextiff lets you upload four dedicated logo variants so your brand stays sharp across the workspace, collapsed navigation bar, and client emails:
- Scroll down to Firm Branding inside Settings → Firm Profile.
- Upload your full-size Current Logo — Dark (for the expanded dark navigation sidebar) and Current Logo — Light (for light brand surfaces, client portals, and email headers—recommended
200 × 60 pxtransparent PNG or WebP). - Upload your compact square emblems under Current Small Logo — Dark and Current Small Logo — Light (
64 × 64 px) so collapsing the left sidebar smoothly transitions to your firm's monogram icon.
Step 3: Request Missing Documents Directly from Clients
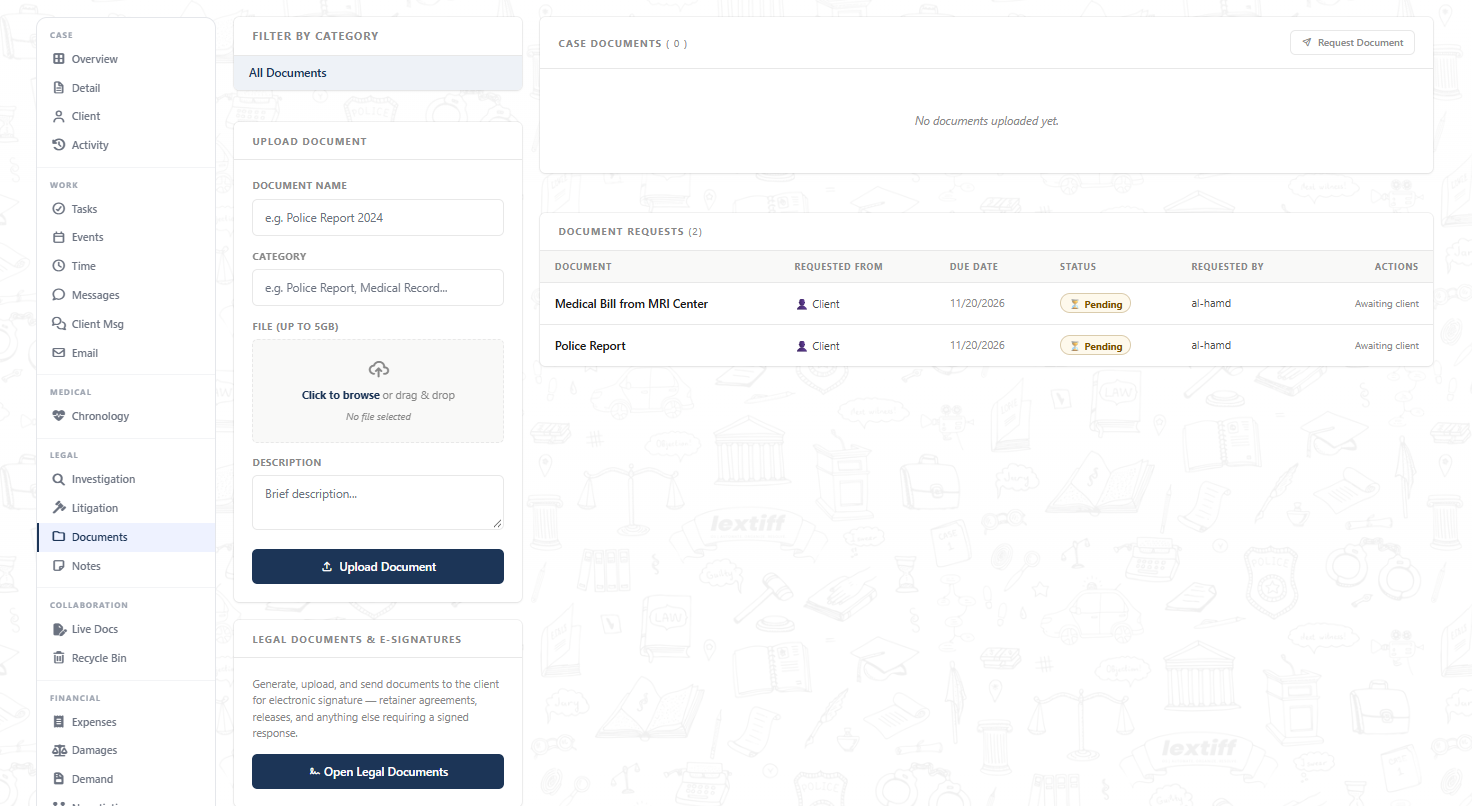
Chasing down police reports, MRI bills, and signed HIPAA authorizations over scattered email threads slows down demand preparation. Use Lextiff's built-in Document Requests tracker to assign clear upload tasks with deadlines:
- Open any active case and select Documents under the LEGAL section on the left sidebar.
- Click Request Document in the top-right corner, specify the requested item (for example, Medical Bill from MRI Center or Police Report), select the recipient (Client), and set a Due Date.
- Lextiff logs every request in the Document Requests table with live Pending status badges, due dates, and requesting staff attribution—and automatically sends your client a branded portal upload link.
Step 4: Customize & Preview Automated Email Templates
Every automated notification—from document requests and e-signature reminders to lien updates and settlement statements—can be tailored to match your firm's voice:
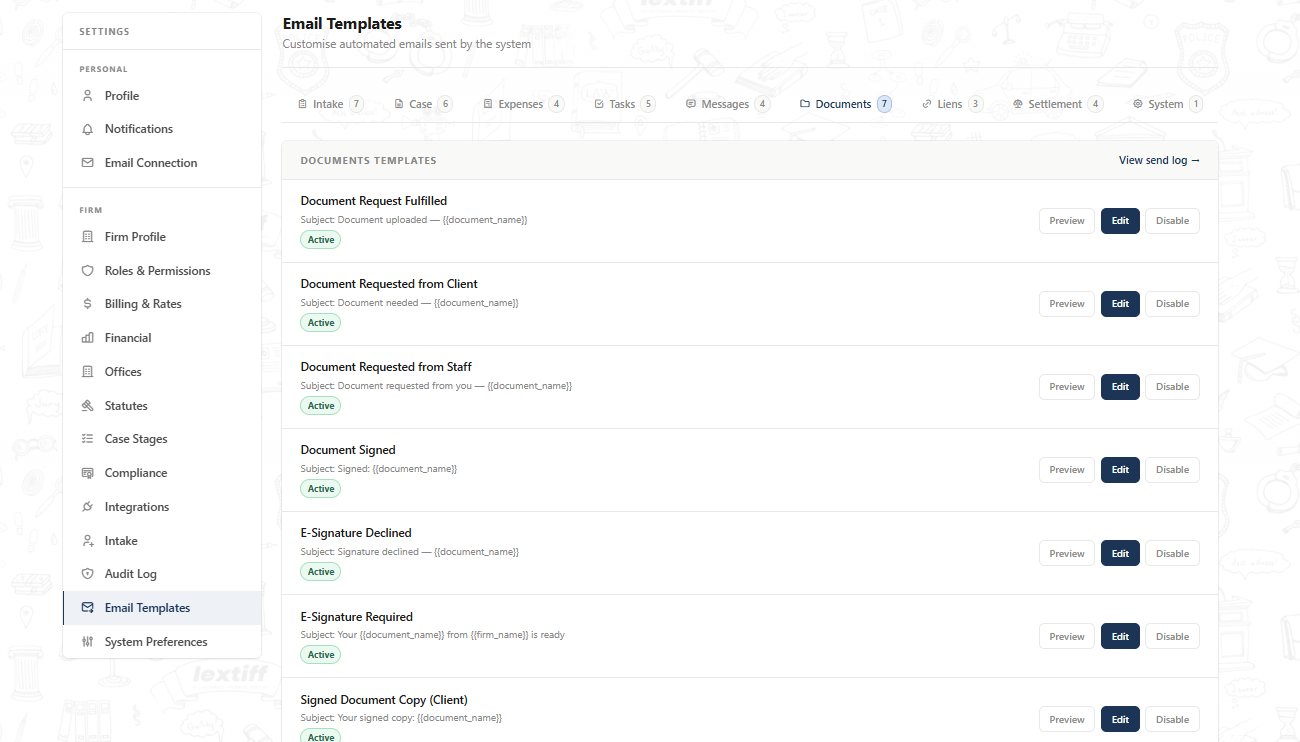
- Go to Settings → Email Templates to browse templates organized across nine workflow stages: Intake (7), Case (6), Expenses (4), Tasks (5), Messages (4), Documents (7), Liens (3), Settlement (4), and System (1).
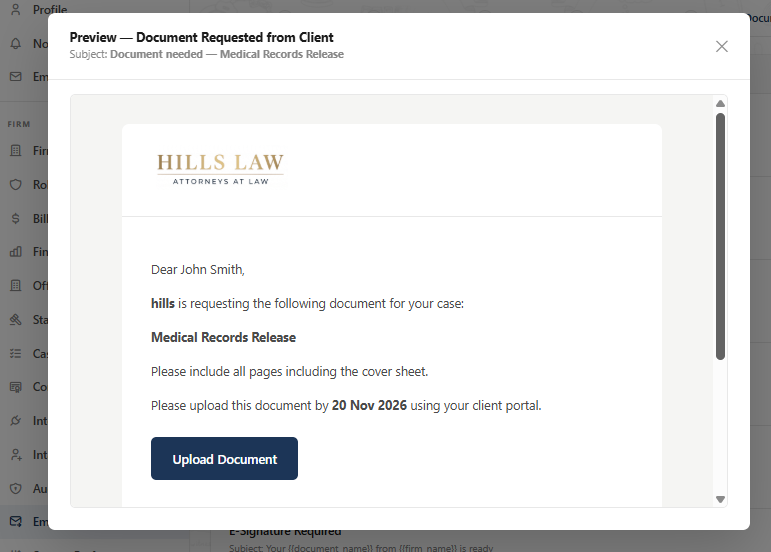
- Click Edit on any template (such as Document Requested from Client or E-Signature Required) to customize the subject line, body copy, and dynamic merge tags like
{{document_name}}and{{firm_name}}. - Click Preview to inspect the exact white-labeled email your client receives—complete with your firm's light header logo, due date, and one-click Upload Document portal button—and use View send log to audit delivery history.